Hi everyone,
It's Monday and that means a new Simon Says Stamp Monday Challenge! This week it's all about "Get in Shape". Make a dimensional project, or a shaped card. Or if you are inspired by the theme getting in shape physically, that's okay too.
I was making cards a lot lately that a shape theme was a real challenge for me. But I'm glad I came up with the idea of making a tea box out of foamboard . I've already made two for myself, a larger one for my home and a little one for work, click here for that blog post. This one is for a friend of mine. She saw it, and wanted one too.
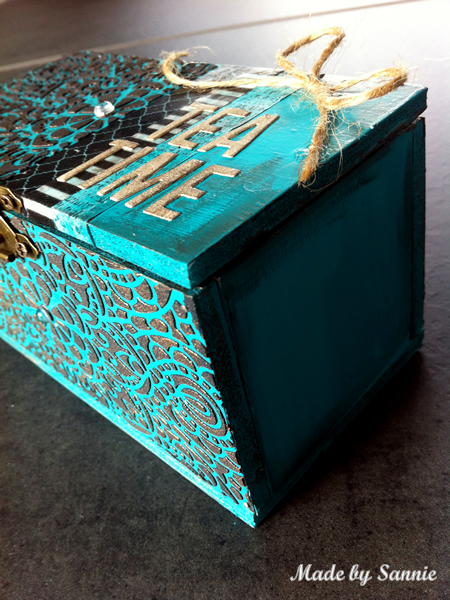
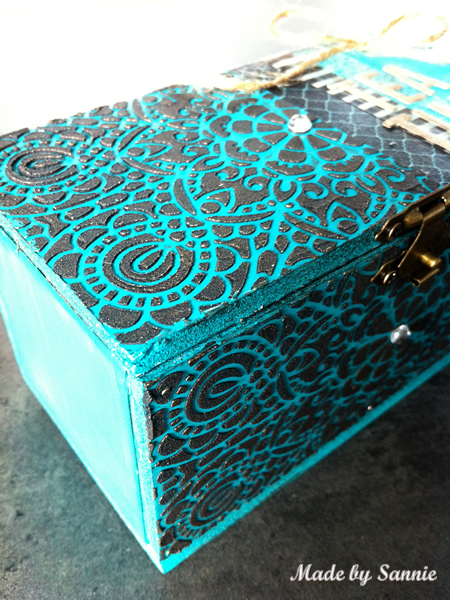
First I figured out the size I wanted and cut it out of 5 mm thick foamboard. The dimensions of the box are 13 x 7 x 7 cm. The pieces I painted with Dylusions Paint Vibrant Turquoise. While I was painting, I saw I forgotten to cut out of the lid. Each piece has got two coats of paint. Normally Dylusion Paint is very liquid, but mine has became a little thicker, and that had a big impact on the drying time.
The next step was to create texture with the Simon Says Stamp Circular Lace stencil and black colored Texture Paste. I partially covered up the lid. I did this for both the top and bottom of the lid. The front and back of the box I have completely covered with Texture Paste and the Simon Says Stamp Circular Lace stencil. Between each use of the stencil I cleaned the stencil, else it would have been a big mess. I also needed a lot of patience for the Texture Paste could dry. After it was dry I started to assemble the box. For assembling I used Tacky Glue and 18 mm pins. The head pins provide extra sturdiness, so that you don't have to wait till the glue is dry. As an alternative, you can also work with a glue gun. I'm not so great with that at all, and so I have found this method.
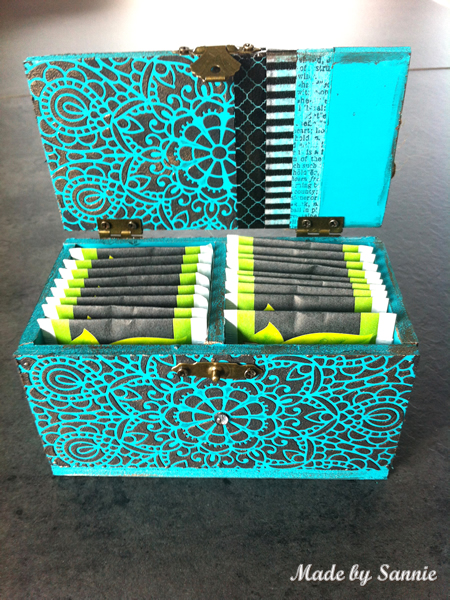
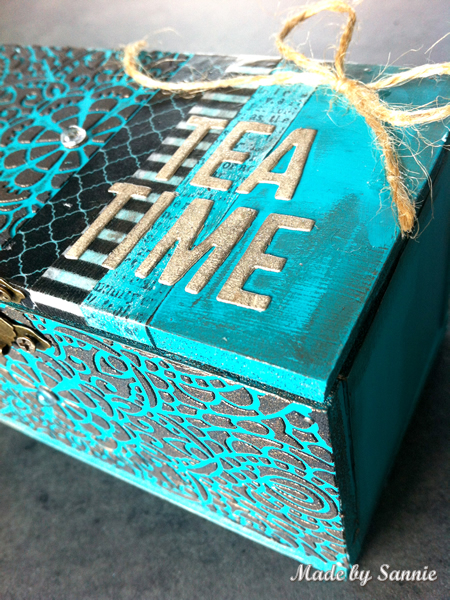
In order to give the Texture Paste a little more extra, I've applied Metallique Wax Bronze Age on top of it with my fingers. This gives it a more luxurious look and as if it is some older metal. Washi tape shouldn't be missing and along with the Alphabet Thinlits and a jute bow, so it looks like the first generation. The real challenge was the hinges and the lock. I used old ones that are very similar to those of a cigar box. The screws I rolled in Tacky Glue because foamboard is not really screwable material and the glue makes sure that they will stay in place.
VIDEO:
SUPPLIES:

To join in all you need to do is make a project that fits this weeks challenge and you can be the winner of the $50 gift voucher that our amazing sponsor Simon Says Stamp offers. This prize will go to a random entry. So go over to the Simon Says Stamp Monday Challenge blog, let the DT members inspire you and join in the fun!

You have until Monday 8am Ohio time. 1pm UK time, 2 pm CET to join in.
Follow Simon Says Stamp on Instagram

If you use instagram add #sssmchallenge to your challenge entry uploads so we can see them on there too!

Thank you for stopping by! Love to see you next time!
Hugs,
Sandra
It's Monday and that means a new Simon Says Stamp Monday Challenge! This week it's all about "Get in Shape". Make a dimensional project, or a shaped card. Or if you are inspired by the theme getting in shape physically, that's okay too.
I was making cards a lot lately that a shape theme was a real challenge for me. But I'm glad I came up with the idea of making a tea box out of foamboard . I've already made two for myself, a larger one for my home and a little one for work, click here for that blog post. This one is for a friend of mine. She saw it, and wanted one too.
First I figured out the size I wanted and cut it out of 5 mm thick foamboard. The dimensions of the box are 13 x 7 x 7 cm. The pieces I painted with Dylusions Paint Vibrant Turquoise. While I was painting, I saw I forgotten to cut out of the lid. Each piece has got two coats of paint. Normally Dylusion Paint is very liquid, but mine has became a little thicker, and that had a big impact on the drying time.
The next step was to create texture with the Simon Says Stamp Circular Lace stencil and black colored Texture Paste. I partially covered up the lid. I did this for both the top and bottom of the lid. The front and back of the box I have completely covered with Texture Paste and the Simon Says Stamp Circular Lace stencil. Between each use of the stencil I cleaned the stencil, else it would have been a big mess. I also needed a lot of patience for the Texture Paste could dry. After it was dry I started to assemble the box. For assembling I used Tacky Glue and 18 mm pins. The head pins provide extra sturdiness, so that you don't have to wait till the glue is dry. As an alternative, you can also work with a glue gun. I'm not so great with that at all, and so I have found this method.
In order to give the Texture Paste a little more extra, I've applied Metallique Wax Bronze Age on top of it with my fingers. This gives it a more luxurious look and as if it is some older metal. Washi tape shouldn't be missing and along with the Alphabet Thinlits and a jute bow, so it looks like the first generation. The real challenge was the hinges and the lock. I used old ones that are very similar to those of a cigar box. The screws I rolled in Tacky Glue because foamboard is not really screwable material and the glue makes sure that they will stay in place.
VIDEO:
SUPPLIES:
To join in all you need to do is make a project that fits this weeks challenge and you can be the winner of the $50 gift voucher that our amazing sponsor Simon Says Stamp offers. This prize will go to a random entry. So go over to the Simon Says Stamp Monday Challenge blog, let the DT members inspire you and join in the fun!
You have until Monday 8am Ohio time. 1pm UK time, 2 pm CET to join in.
Follow Simon Says Stamp on Instagram
If you use instagram add #sssmchallenge to your challenge entry uploads so we can see them on there too!

Thank you for stopping by! Love to see you next time!
Hugs,
Sandra