Grunge it up card

Click on the image and see how this was made. There is a video tutorial of the process.

In My Garden card

Click on the image and see how this was made. There is a video tutorial of the process.

Timeless Treasure art journal spread

Click on the image and see how this was made. There is a video tutorial of the process.

Father's day card

Click on the image and see how this was made. There is a video tutorial of the process.

Distress it card

Click on the image and see how this was made. There is a video tutorial of the process.

Monday, October 17, 2011

Grungy Monday: Tim in 10

Hi bloggies,

It's monday and that means Grungy Monday from Studio L3! Today's theme is Tim in 10, which means a time challenge. There was no theme this time, as long as the card is made within 10 minutes time and has one or more of Tim Holtz products on it. This challenge sounds like a lot of fun!
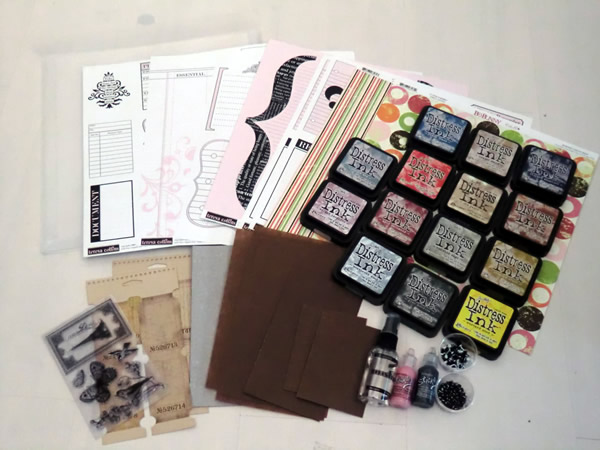
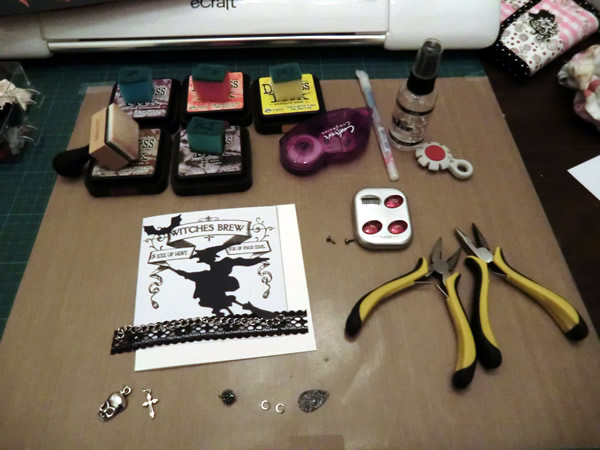
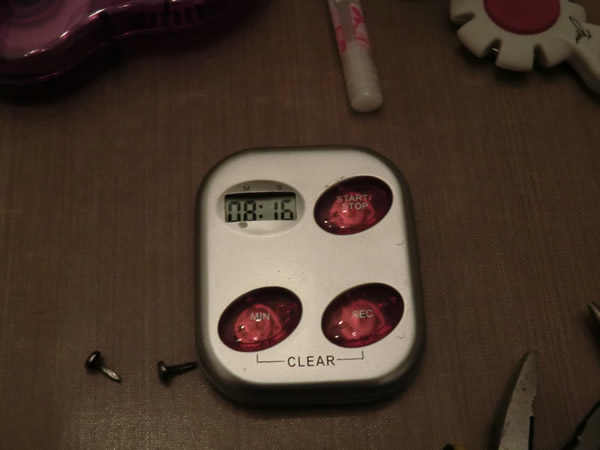
Because time is an issue with this challenge I can't do everything. I was already thinking of using embossing powder, or Stickles or crackle paint. But that takes to long. So I thought of something else. Last week I bought very cool halloween graphics from Lettering Delights that you can print out with your printer. Printing an images takes no time at all, because while the printer is busy, I can do something else. I also wanted to do something  with a diecut. That's also fast to make. After I had a clear picture in my head of what I wanted to make and had done al of the preparation, I was ready to start the time challenge. (Because I printed the background and make the diecut of the witch and bat the time on the timer is 8:16)


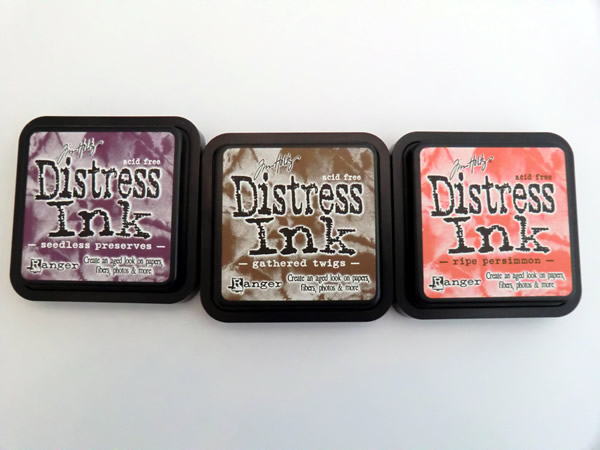
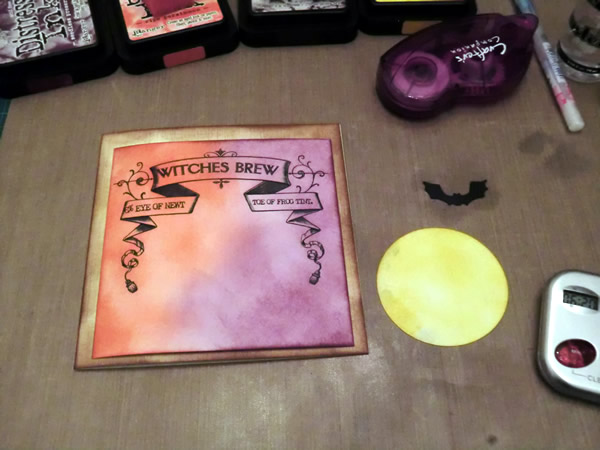
I started with the background of the card with Gathered Twiggs and then the background of thelayer and used Ripe Persimmon Seedless Preserves on it. Then the moon with Musterd Seed and the witch I made a little more black with Black Soot.


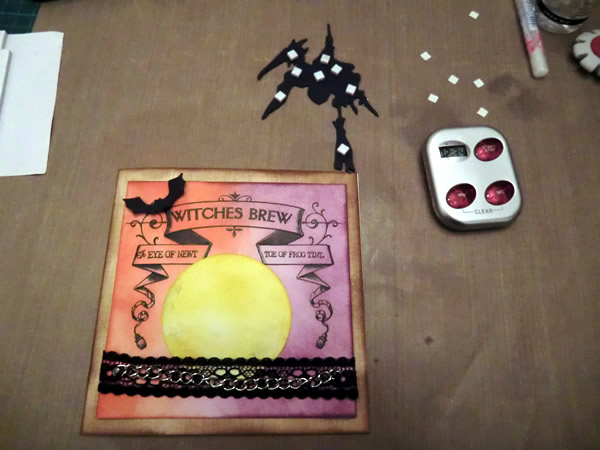
The bat is attached to the card with 3d foam, for a little dimension. Then I glued the moon in the middle. After that I attached the lace on to the card with tape. The chain was too long, so I'd to shorten it. That cost a lot of time.
The chain is attached with brads. When the whole layer had to be glued down on the card, I had to use glossy accents this time. Because the brads and the chain are so thick I couldn't use my tape roller.


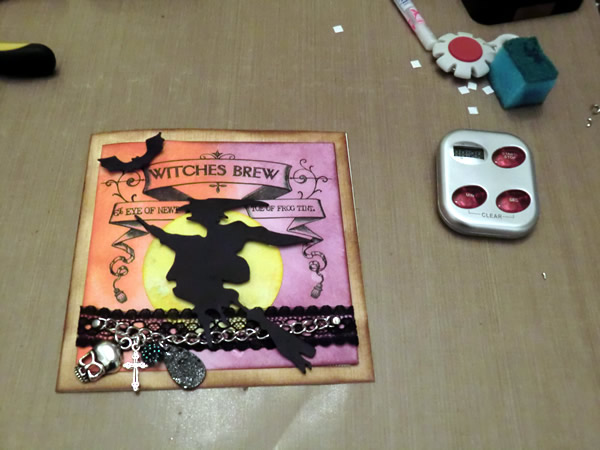
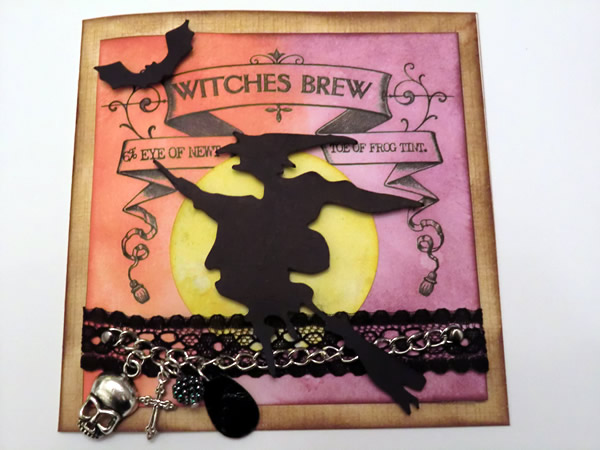
Then I attached the charms to the lace. The witch is attached with 3D foam. The last thing I did was sprinkling some water over the card, and dabbing it of with a cloth.


I just managed to do it within 10 minutes. But that was mainly because of all the preparation. Otherwise it would never have succeeded! Oh, and each time I made a picture, I stopped the timer of course!


Although I was a bit rushed, I had so much fun doing it.
Hopefully you like the result!

Sandra

Sunday, October 16, 2011

Birthday card for my sister

Hi Bloggies!

Today I made ​​a card for my sister's 38th birthday! My sister's birthday is tomorrow and I wanted to make her a nice cheerful card. The last few days I'd used a lot of dark autumn colors and I wanted to work with fresh colors again. Besides, my sister loves bright colors.


I love the idea of  attaching buttons with paint. This idea comes from mycraftchannel.com. This site is a on-line craft TV network, and started broadcoasting just two weeks ago. It's full with great tips and lots of inspiration. Go check it out!
But now back to the card that I made:). I used the same colors from the front for the inside of the card. The stamp is from KaiserCraft, the Bonjour collection. Lately I have a thing for Paris. I've been there a few times and it's a very beautiful city and the atmosphere is so great.
I rambling again ... So it would be better to show you the whole card now;).


Hope you like it, and especially my sister :).

Sandra

Saturday, October 15, 2011

Another OCCC: Totally Transparent

Hi Bloggies!

Today yet another challenge! Yes, again:). From Marjie Kemper I received yet another lovely response, this time on my first OCCC. And she invited me to join again today. And I'm very easy ;), so of course I will. This afternoon my friend Ellen and me had a creative afternoon planned. She went to work to create a layout that will fit in a frame. And I went to work on the new OCCC (Our Creative Corner Challenge). This time the challenge was to use something transparent. First I had the idea of ​​embossing onto the transparency. I knew it would melt and rimple, but I wanted to try it anyway. It looked pretty cool but the embossing came of quickly. So I had to think of somehing else.
From the previous challenge I had some leaves left over. Since it's autumn I wanted to stick to that color pallet. And started to color the leaves with distress ink.I used the new Gathered Twiggs for the leaves! Then I had a idea to cut the leaves out of transparency. I've smeared stickles on them with my finger. I didn't have matching color ribbon and lace, so I inked them with stains. This is the result:


Hope you like it!

Sandra

Mini haul

Hi Bloggies!

Last month and this month I put myself on a budget, because the last 2 months I'd  bought way too much. It went well for a while, but this week I couldn't help myself and I bought too much again... The rest of the month I forbidden myself to buy anything!


And yes I'm happy owner of the seasonal distress ink! Whoohoo!


Of this haul, I forgot to take pictures when the order arrived and when I got back from the  scrapbook store I'd been. That explains why some of the things are out of their packaging. Now I've got all the distress inks, including the seasonal ones. Yippie!


See you next time!
Sandra

Thursday, October 13, 2011

First OCCC (Our Creative Corner Challenge)

Hi bloggies!

Yesterday I received a lovely comment from Marjie Kemper on my blog, so I visted the blog she's a part of Our Creative Corner.  On that blog, I saw a great challenge. It was a color challenge. Fortunately, the time of closure was  3 days away, and I could still participate. I had so much fun making it. And this is the result:


I crumpled the brown background to give a rough edge to the card. The leaves are made with 6 different colors of distress ink. The veins in the leaves were created by folding them into the leaves and go over them with distress ink. They almost look real, don't they? Well, I think they do :).
The tag is also done with distress ink. I'm crazy about distress ink, haha. And the zigzag trim are colored with distress stains.

Hope you like it!
Sandra

Smashbook day 18: Blogspot

Today is the last day of my smashbook project. The theme is Blogspot. Just over a month ago I started this blog with blogspot and I really enjoy it. I just have fun posting messages and creating things. In my first post on this blog I've already explained why I started this blog with blogspot. I hope you keep enjoying my blog.

On the left page I used the Blogspot logo. I have used distress ink, spiced marmalade, brushed corduroy and old paper, on it. Gives it a nice gruncy look.


On the right page, I made ​​a screenshot of my blog of this moment. On the edges of the paper i used the paper distresser.


At the moment I have a project I in de works and serveral ideas that I want to excecute!
So I'll be back soon!

Sandra

Wednesday, October 12, 2011

Smashbook day 17: Tim Holtz

Hi bloggies,

My theme today is the grunge king himself Tim Holtz! Hihihi. Because of Lein I knew of distress inkpads and decided to buy them when I started making cards and after I'd seen video's with all different techniques. I also ordered stains with it and I started working. I like the grunge and vintage look very much, and find his products are also very cool. In the past few months I have purchased quite some products of Tim (also ranger, stampers anonymous, etc.) such as 22 distress inkpads (eventually I would like them all, including the limited ones), 7 distress stains, mini mister, mister bottle, grunge board, crackle paint, Stickles, perfect pearls, archival ink blending tool, paper distresser, paint dabbers, embossing powder, non stick craft sheet, and lots of stamps. Only the embellishments are missing in my collection. Here are  the first tags and first cards that I made with distress:
  
  
I love the style and the techniques where Tim stands for and I have applied some of it for this smashbook. Love it,love it, love it!!

On the left page I used distress ink for the background, and for the tags stains and distress. The right ticket I just got yesterday. And of course I had to use it for this book immediately.


On the right page of course a picture of Tim, with his crown above his head that I've embossed. And over the photo, I did his logo of vinyl and gone over it with gun metal stickles.


Tomorrow is the last theme of my smashbook. But my smashbook isn't full yet, so when I discover something new and fun to smash, I will post a message about it.

See you tomorrow!
Sandra