Grunge it up card

Click on the image and see how this was made. There is a video tutorial of the process.

In My Garden card

Click on the image and see how this was made. There is a video tutorial of the process.

Timeless Treasure art journal spread

Click on the image and see how this was made. There is a video tutorial of the process.

Father's day card

Click on the image and see how this was made. There is a video tutorial of the process.

Distress it card

Click on the image and see how this was made. There is a video tutorial of the process.

Wednesday, August 31, 2016

12 tags of 2016 - August

Hi everyone,

End of the month  it my Tim time, and this August tag is really a combo of amazing techniques. The Brayed Stain of July 2013 and Frameworks of April 2014. Is it really been that long that I've done those techniques?! Time really flies!

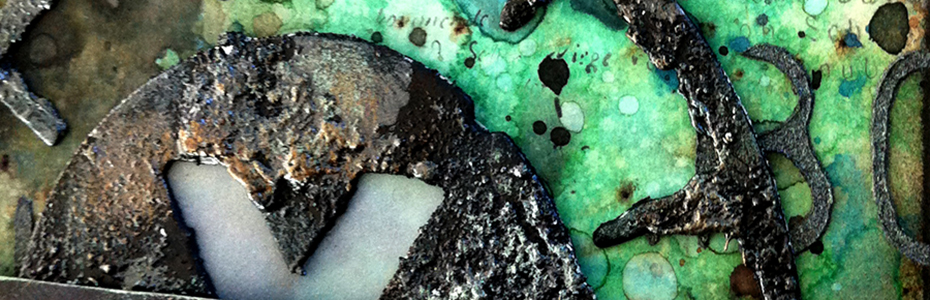
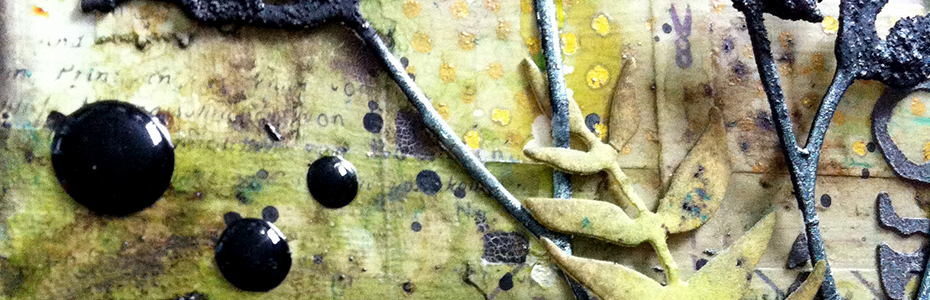
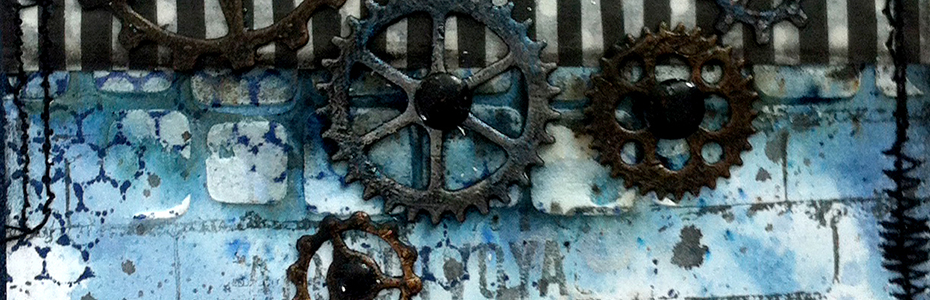
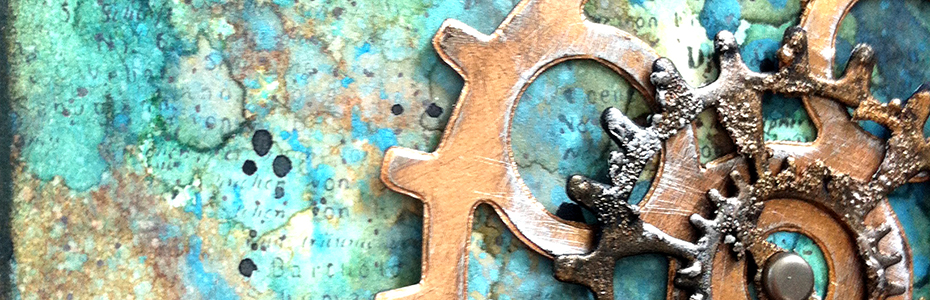
Frameworks dies are amazing, but I use them not a lot. It really gives the project such a cool effect. I'm so happy that Tim chose this technique!


The Brayed Stain is actually a technique that I only used to 12 tags, at least that I can recall. Love that it made it's come back for this tag. The edges have I done with Distress Crayon black soot. That's a technique that will come back many times! LOL!


SUPPLIES:


Thank you for stopping by! Love to see you next time!

Hugs,
Sandra

Monday, August 29, 2016

Stitch up card with video tutorial

http://www.simonsaysstampblog.com/mondaychallenge/

Hi everyone,

It's Monday and that means a new Simon Says Stamp Monday Challenge! This week it's all about It's a Stitch up! Are you in for a felt project or stitching some paper? Or maybe some faux stitching like me.

This Bo Bunny Stitches stamp set I've got for ages and it's one of my favorite stamps to give interest around the edges of my projects. Of course I had to use it for this challenge.


 First I stamped the Time Traveler with Archival Ink and MISTI tool, otherwise I don't get a good result on watercolor paper. Once the ink was completely dry, I've colored him in with a bunch Distress Markers and waterbrush. Between layers, I dried the paper.


After I had finished coloring, it was time to protect my colored Time Traveler and I've used MicroGlaze to seal it. I picked the same colors that I've used for coloring the Time Traveler for the background. It was a big muddy mess. But a bit more blue helped a lot. With a tissue I dabbed away the excess ink and that was a big difference.


I darkened the edges with Distress Crayon Black Soot. I absolutely love this effect. With the Bo Bunny Stitches stamp, Versamark and Pewter Embossing Powder I made a stitched edge, love that it really pops, but not too much.

VIDEO:


SUPPLIES:

50dollar_voucher_600px
To join in all you need to do is make a project that fits this weeks challenge and you can be the winner of the $50 gift voucher that our amazing sponsor Simon Says Stamp offers. This prize will go to a random entry. So go over to the Simon Says Stamp Monday Challenge blog, let the DT members inspire you and join in the fun!
http://www.simonsaysstampblog.com/mondaychallenge/
You have until Monday 8am Ohio time. 1pm UK time, 2 pm CET to join in.

Follow Simon Says Stamp on Instagram
Instagram
If you use instagram add #sssmchallenge to your challenge entry uploads so we can see them on there too!


Thank you for stopping by! Love to see you next time!

Hugs,
Sandra

Monday, August 22, 2016

Under the Sea Birthday card with video tutorial

http://www.simonsaysstampblog.com/mondaychallenge/

Hi everyone,

It's Monday and that means a new Simon Says Stamp Monday Challenge! This week it's all about Go Fish.


This week I had quite a bit of trouble figuring out what to do with this challenge. Fishing is not really my thing, but then I remembered that the world under water is so pretty, and that got me excited to do this one! The Kaisercraft Mermaid Tail stamp set is perfect for creating an underwater world.


The experimenting of the CC103 techniques continues and I mix and match everything together to see what it brings me. I need to remind me all the time that when I'm experimenting and it looks like it's not going well, I've got to keep going. Most of the time it works and the result is extra special and I'm extra happy! LOL! While making this card I had a few moments like that, but glad I kept going, because I love the end result.


In my future projects, I think I'll use the Distress Crayon Picket Fence and Black Soot lots more applying high and low lights. It gave everything so much more depth.

VIDEO:


SUPPLIES:

50dollar_voucher_600px
To join in all you need to do is make a project that fits this weeks challenge and you can be the winner of the $50 gift voucher that our amazing sponsor Simon Says Stamp offers. This prize will go to a random entry. So go over to the Simon Says Stamp Monday Challenge blog, let the DT members inspire you and join in the fun!
http://www.simonsaysstampblog.com/mondaychallenge/
You have until Monday 8am Ohio time. 1pm UK time, 2 pm CET to join in.

Follow Simon Says Stamp on Instagram
Instagram
If you use instagram add #sssmchallenge to your challenge entry uploads so we can see them on there too!


Thank you for stopping by! Love to see you next time!

Hugs,
Sandra

Monday, August 15, 2016

Summer Fun card with video tutorial

http://www.simonsaysstampblog.com/mondaychallenge/

Hi everyone,

It's Monday and that means a new Simon Says Stamp Monday Challenge! This week it's all about Summer Fun.

My summer was al about the summer of Creative Chemistry and for me that was definitely summer fun! I've actually rarely Texture Paste colored after it's applied. And certainly not with Distress Ink. In CC you're encouraged to put the "what if's" into practice. It's so fun to experiment, because I love the sort of white halo around the Texture Paste after I applied the color with Distress Ink. It's a different kind of shadow, a softer one that I find very pretty surprisingly.


With crazing I find very difficult to apply the right amount. It only gives a few spots the crazing everytime I try it. The right thickness of the layter, I apparently haven't mastered yet. I'll have to practice some more with it.


VIDEO:


SUPPLIES:

50dollar_voucher_600px
To join in all you need to do is make a project that fits this weeks challenge and you can be the winner of the $50 gift voucher that our amazing sponsor Simon Says Stamp offers. This prize will go to a random entry. So go over to the Simon Says Stamp Monday Challenge blog, let the DT members inspire you and join in the fun!
http://www.simonsaysstampblog.com/mondaychallenge/
You have until Monday 8am Ohio time. 1pm UK time, 2 pm CET to join in.

Follow Simon Says Stamp on Instagram
Instagram
If you use instagram add #sssmchallenge to your challenge entry uploads so we can see them on there too!


Thank you for stopping by! Love to see you next time!

Hugs,
Sandra

Thursday, August 11, 2016

CC103 - day 5

Hi everyone,

It's day five of Creative Chemistry 103 and we were again treated to as much as 6 Techniques! Unfortunately I didn't realise that only Yupo was used as a substrate, so I got some ordered at a local craft store, so that's why I'm a bit late. After some experimenting it apparently it isn't official Yupo (it's sold in a package without a brand on it), the results aren't as they should be. With the effects I get looks like it's between Glossy and the Yupo which sells Ranger. So now I've ordered the Ranger one, hopefully it will work better ...


The first technique: Alcohol Ink Stamped on Yupo Resist Technique. I couldn't get it to work, the paper doesn't do what it's suposed to do following Tim's instructions. If you look carefully you'll see a light ghosting. I've tried it  wiht several different Archival Inks, Jet Black, Watering Can, but saw no difference ...
 

The second technique: Alcohol Ink Faded Layers on Yupo Technique. In the picture the right side looks better than in real life. In real life it looks more like the left side...


The third technique: Alcohol Ink Texture Resist on Yupo Technique. This technique didn't work either. I think the ink can soak in better than it should.


The fourth technique: Alcohol Ink Painting on Yupo Technique. That technique was fun to do and it finally worked as it should. I took Kristina's example.


The fifth technique: Alcohol Ink Liquid Landscapes on Yupo Technique. This technique was nice, but it doesn't dry in the more hard lines as I'd like, but perhaps that is more a matter of practice.


The sixth technique: Alcohol Ink Splattered Floral Technique. I unfortunately have no canned air, and had to use a straw. I tried to make a flower, but that was a disaster. Therefor I made a colorful abstract background. Love it! 


Thank you for stopping by! Love to see you next time!

Hugs,
Sandra

Monday, August 8, 2016

Halloween Coffin Treats Box with video tutorial

http://www.simonsaysstampblog.com/mondaychallenge/

Hi everyone,

It's Monday and that means a new Simon Says Stamp Monday Challenge! This week it's all about Try to Contain yourself. There are so many possibilities for this theme, you could alter a container, cup, tin, bottle, box etc or make a container from scratch!


Halloween isn't yet around the corner, but with all the Halloween release announcements, my spooky ideas popped-up in my head, I couldn't resist to make a Halloween project. The coffin treat box is a SVG file that I have purchased online and I've cut it out with my Silhouette Cameo. I've adjusted the size, which is convenient with digital cutting files.


When the box was put together, I could start altering it. I first cut out some cobwebs with the Haunted Webs die and then small bats. The Haunted Webs are discontinued, but Fine Spider Webs is a great replacement. After I glued everything I first painted it all black with Black Soot Distress Paint.


After the paint was dry, I've did kind of the dry brush technique with my fingers and Paint Distress Walnut Stain. Although I must admit that the dry brush technique with an actual brush gives a better result, it was fun to experiment and try it.


For the edges on the lid, I used my technique that I've done recently with the Wildflowers, I used black paint and poured Black Soot Distress Embossing Powder over it and heated it with my embossing heat tool.

VIDEO:


SUPPLIES:

50dollar_voucher_600px
To join in all you need to do is make a project that fits this weeks challenge and you can be the winner of the $50 gift voucher that our amazing sponsor Simon Says Stamp offers. This prize will go to a random entry. So go over to the Simon Says Stamp Monday Challenge blog, let the DT members inspire you and join in the fun!
http://www.simonsaysstampblog.com/mondaychallenge/
You have until Monday 8am Ohio time. 1pm UK time, 2 pm CET to join in.

Follow Simon Says Stamp on Instagram
Instagram
If you use instagram add #sssmchallenge to your challenge entry uploads so we can see them on there too!


Thank you for stopping by! Love to see you next time!

Hugs,
Sandra