Grunge it up card

Click on the image and see how this was made. There is a video tutorial of the process.

In My Garden card

Click on the image and see how this was made. There is a video tutorial of the process.

Timeless Treasure art journal spread

Click on the image and see how this was made. There is a video tutorial of the process.

Father's day card

Click on the image and see how this was made. There is a video tutorial of the process.

Distress it card

Click on the image and see how this was made. There is a video tutorial of the process.

Monday, February 25, 2013

Use that stamp

Hi everyone,

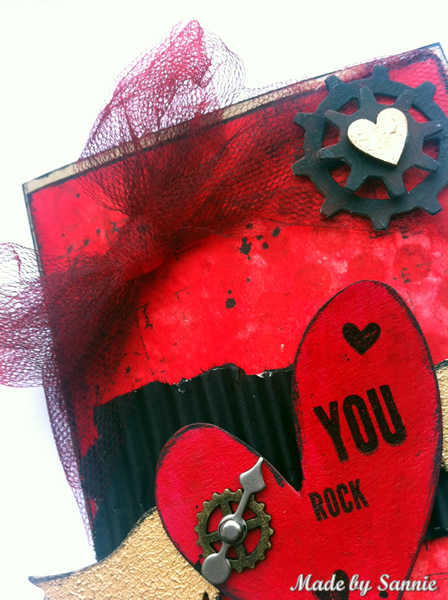
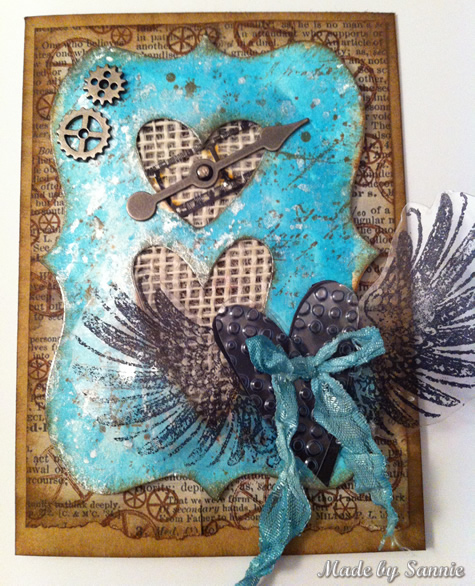
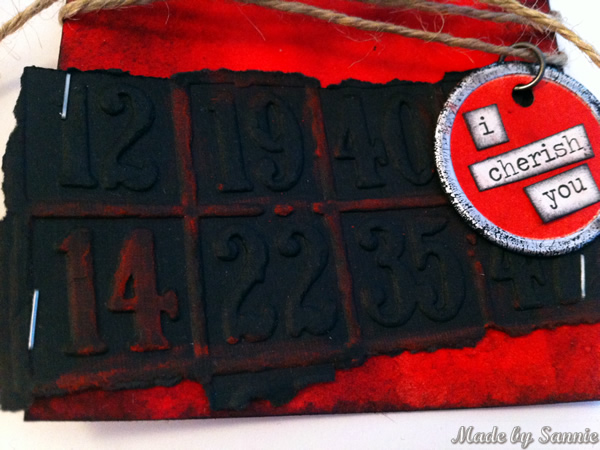
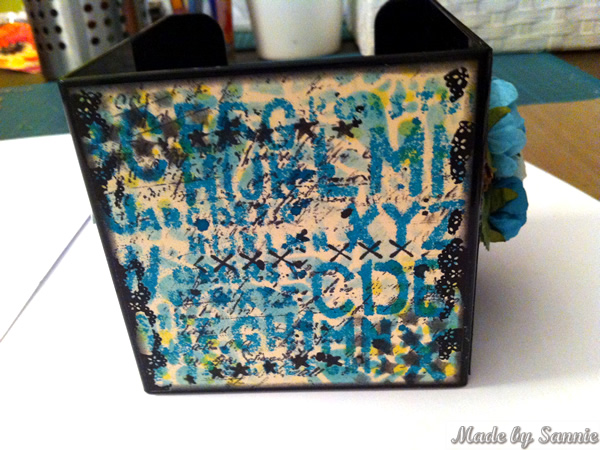
Yet another month to go and it's finally spring time! Simply can't wait for the winter and the cold to be over. So I'm in the mood for some bright colors! For this week's challenge at Simon Says Stamp and Show we're asked to use a stamp we love but didn't use (yet). I have lots of stamps (well, I think I do) and I use them almost always immediately when I get my hands on them. Well, only the ones I really like. Sometimes there are some stamps in a set that aren't really my thing, or I don't have inspiration for. I looked through all my stamps and have found two that I've never used and I don't have a reason why not. It is the stamp from Tim Holtz Classic #6 Collection and an exclusive stamp from Simon Says Stamp.


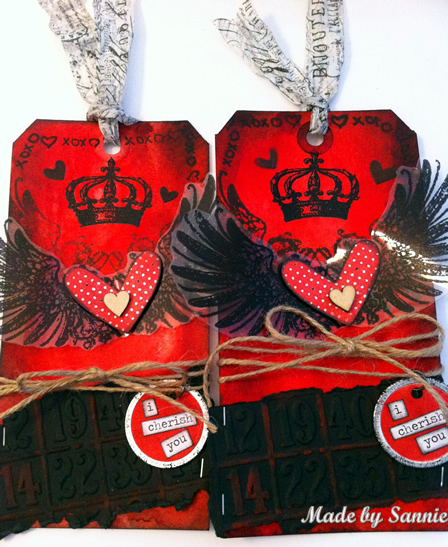
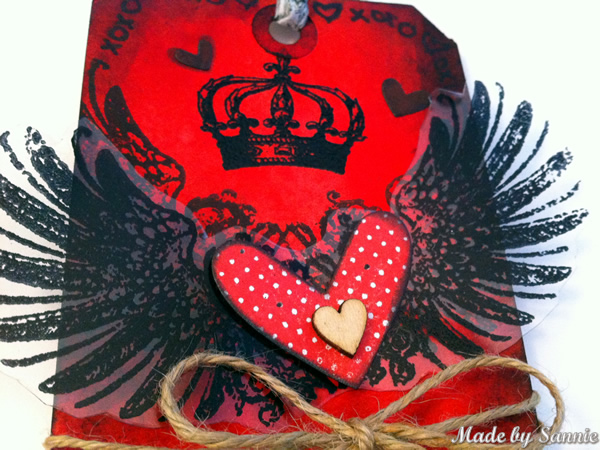
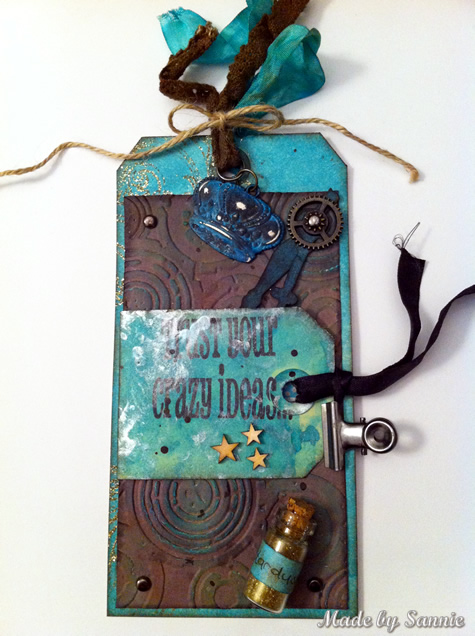
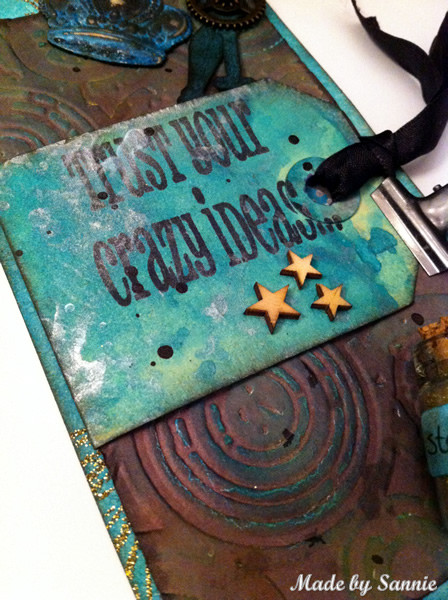
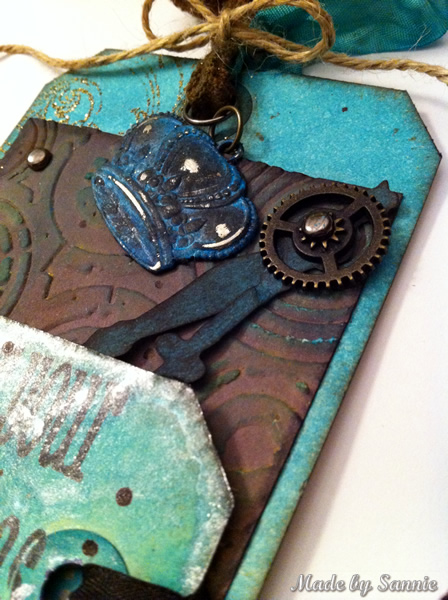
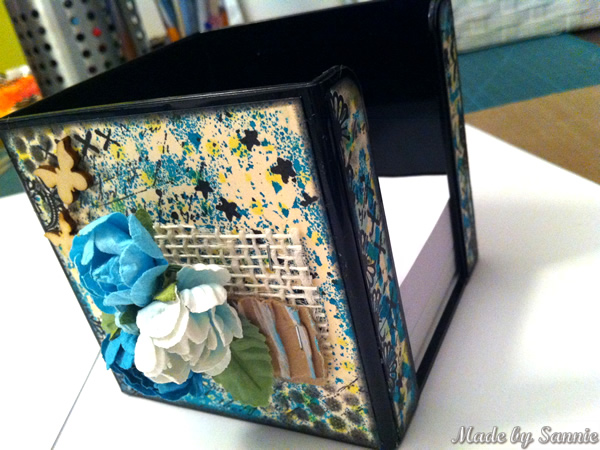
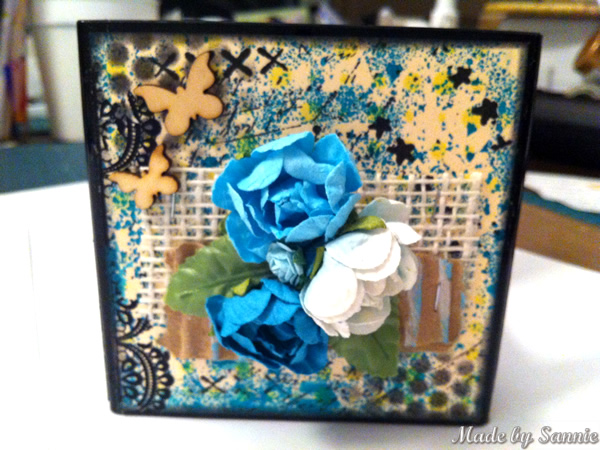
I think those big tags are so cool, you can do so much more with them. I immediately went spraying with the Dylusions Sprays and the Ampesand Mask. Boy, do I love nice messiness. When I start playing with stencils, Ijust can't stop. So I used them with Distress Ink to create more layers and dimension. I also wanted to create more texture by using modeling paste. To make the Ampersand more pop, I used a gear in the middle. So deliously random, I love it!


To join in all you need to do is make a project that fits this weeks challenge and you can be the winner of the $50 gift voucher that our amazing sponsor Simon Says Stamp offers. This prize will go to a random entry. So go over to the Stamp and Show Challenge blog, let the DT members inspire you and join in the fun!

Thank you for stopping by! Love to see you next time!

Hugs,
Sandra

Friday, February 22, 2013

Time

Hi everyone,

This week has been a very intense week. It's always hard to say goodbye, but if someone is so young (10 years), it's extra hard and so not fair. This makes me think again about my life and really put things back in perspective. It's all a matter of time. Life consists of time. Fun times, time we spend together, but also difficult times. Fortunately, time also heals. With this canvas I participate with Frilly and Funkie where the challenge is to use a single word as focal point.

It had been a while since I had done a canvas. As basis I used Bazzil Antique Paper and Tissue Wrap. On top I used several stamps and stencils. In order to give more texture I had some fun with modeling paste.


It's became a bit darker than I intended, but it was such an intense week and it reflects how I felt during this week.


Thank you for stopping by! Love to see you next time!

Hugs,
Sandra

Monday, February 18, 2013

Foam board storage

Hi everyone,

Another week has arrived and that means Simon Says Stamp and Show has a new challenge in store for us. This week we get to work with metal, because the theme is Metal-ology! I must admit that I had a little trouble with this challenge. I wanted to make something different.
But before I share you my project I wanted to tell you guys we have a fabulous guest designer, Janeen at SuburbNgyspy. Check out here amazing project she made for us this week!


For a while I was looking for a good way to store my stencils and rub-ons, because the box where I kept them in wasn't really convenient. Why shouldn't I make some storage for them. I had some foam board left over and I went straight to work. Fortunately I have worked with foam board before and know what I should and should not do. First I drew how I wanted it and soon I had the necessary parts cut out.


The parts I painted all black, because almost all of my storage stuff is black. And it just looks really cool in black. To give it a metal edge, I painted the edges with the Pearl Paint Dabber. Yes indeed, the Pearl Dabber. On black it looks like aluminum. Unfortunately, it doesn't really show in the pictures.


To make it as practical as possible, I wanted to use dividers, and I wanted them to be adjustible. Well, how would I solve this? A light bulb moment later I realized I could use corrugated cardstock for it. This I also painted black and smeared it with a little bit of Pearl Paint Dabber. And glued it to the sides.


Then it was time to assemble the box. I already knew that the glue gun and I aren't best friends and Tacky Glue is such a better friend to me! That really works perfectly and make it all fit great together. To make sure that everything stays in place, I stuck some sequin pins in it. I didn't have to wait for it to dry. I used it right away!


To embellish it, I painted some left over corrugated cardstock, and on top op that I cut some letters out of Metal Foil. Finally, something of real metal ... LOL.


In the picture you can't see very well that the box has sloping edges, but that makes it a bit different and easier in use. It's so amazing how light it is and yet so strong. Although it's made out of foam board, it is very robust.


To join in all you need to do is make a project that fits this weeks challenge and you can be the winner of the $50 gift voucher that our amazing sponsor Simon Says Stamp offers. This prize will go to a random entry. So go over to the Stamp and Show Challenge blog, let the DT members inspire you and join in the fun!

Thank you for stopping by! Love to see you next time!

Hugs,
Sandra

Thursday, February 14, 2013

Happy Valentine's Day!

Hi everyone,

Happy Valentine's Day! I wish you all a wonderful day filled with love! From my best friend, Lein, I always get a beautiful card with Valentine. Sweet huh? This card I made ​​for her. She is crazy about the color red, deep red and that's perfect for this day! I'm entering this card with Frilly and Funkie, where the challenge Heartsy Lacy Valentine's Project. My heart is not really lacy, but I do have used lace and it's a valentine project...So I guess it fits the bill.


I used for the background the same technique as for the February tag from the 12 tags of 2013. Very cool technique, and to give the red some more definition I used different shades of red Distress Inks. Then I worked in some some stencils with the darker shades of red.  (The colors in the picture don't match a bit. There it's all orangy red, but it's actually deep red and you don't see all the different shades. So I'm making new pictures tomorrow, hope they'll be better. With daylight the colors are a bit more realistic, but still not deep as the reel thing unfortunately) To give it a little touch of black I randomly stamped with the Music Sheet stamp, made some splatters with Dylusion Spray and painted the edges black. The red tulle I got from my bestie and fit nicely with this card. I made it a little bit darker by spraying with Black Marble, so it does not fade away into the background.
The text stamps and hearts are exclusive stamps from Simon Says Stamp!


Thank you for stopping by! Love to see you next time!

Hugs,
Sandra

Monday, February 11, 2013

Dare to be messy

Hi everyone,

Love is in the air! Do you feel it too? This week is all about Valentine's Day. Well, maybe not with everyone, but it's quite a great time to do something love-like. This week at Simon Says Stamp and Show the challenge is not related to Valentine's Day, but making a delicious mess. The project does not need to look messy, but it would by wonderful if the process was messy. I'm the very messy crafter type. Almost after every project Mr. Scrubby can get down to scrub my hands clean. So I know that I can safely enjoy making a mess while crafting.


I didn't made ​​this card for valentine, but for a dear blog friend of mine whose birthday it was. So that's why I didn't go all red. But even if it was a valentines project I like to be other then traditional. The card base is from Kraft and then I used a very thin pattern paper by Bazzil on top of it. I distressed the edges with Walnut Stain Distress Ink and stamped with the Craftsman stamp from Prima Marketing.


Then I cut out the Ornamental Die and did my favorite messy technique with it, that I call Marbled Metallic Stain technique, because I don't know it's offical name. If I do this technique I make a complete mess.


On the top I stamped the wings with StazOn on a sheet and fuzzy cut it out. And I cut out the heart also out of sheet and embossed it to give it some texure. Punched two holes in it and made ​​a bow.


To join in all you need to do is make a project that fits this weeks challenge and you can be the winner of the $50 gift voucher that our amazing sponsor Simon Says Stamp offers. This prize will go to a random entry. So go over to the Stamp and Show Challenge blog, let the DT members inspire you and join in the fun!

Thank you for stopping by! Love to see you next time!

Hugs,
Sandra

Wednesday, February 6, 2013

12 tags of 2013 - February

Hi everyone,

What did Tim Holtz spoil us with another stunning tag. I'm delighted that he continues this year with the 12 tags! What a gorgeous tag he has made for us​​. I honestly had a little struggle because I didn't have the  beautiful blueprint stamps and I needed to find a replacement. But I'm happy with my alternative
This time I made ​​two tags at once, because I have a swap but I also want to have all the 12 tags for myself. I've never made ​​a project multiple times simultaneously, usually when I need to make more than one, I make a sample first and then I make the rest simultaneously. But then you already know what you want to do. It was a fun experience!


The heart on the wings is an exclusive stamp from Simon Says Stamp! And I cut it out with the matching die. The round tag is an exclusive too! What are those cute huh?
I don't have Kraft Core so as an alternative to emphasize the embossing I used red chalk.


Thank you for stopping by! Love to see you next time!

Hugs,
Sandra

Monday, February 4, 2013

Magical stardust

Hi everyone,

The first Monday of February is a fact and what also is a fact is that Simon Says Stamp and Show has a new challenge for us! This challenge is not based on facts but on your belief in magical things. The theme of this week is Once upon a time. I love fairy tales, especially because they are full of inspiration and they are so very creative, they trigger your imagination. My tag is based on the movie Stardust. I'm really a movie fanatic and I instantly thought about this movie with all its creativeness.


As base, I used a # 8 manila tag. I distressed it with Peacock Feathers. I can't help it but Peacock Feathers is just my favorite color, but it represents the fallen star in the movie. I had a scrap piece of brown cardstock which I embossed with Retro Circles embossing folder. That looks like the crater the star left behind when she fell from the sky. On the Retro cirlces I worked with chalk to give a subtle color. Of course the little vail with stardust couldn't miss...


To join in all you need to do is make a project that fits this weeks challenge and you can be the winner of the $50 gift voucher that our amazing sponsor Simon Says Stamp offers. This prize will go to a random entry. So go over to the Stamp and Show Challenge blog, let the DT members inspire you and join in the fun!

Thank you for stopping by! Love to see you next time!

Hugs,
Sandra

Friday, February 1, 2013

Spruce it up!

Hi everyone,

Can you believe it's February already?! Jeez the first month of 2013 is already gone in history! Today I join in the fun with the Frilly and Funkie challenge. I must admit that I had trouble with this one. I didn't really know what was meant by spruce it up, but after some research and after some tips from Terry, I soon had an idea in mind, but I didn't had the time to get started ... But fortunately I was able to make some time to get sprucy :).

 
My project that I spruced up is my note block container. I cut some manila cardstock to the size of the outside of the container and I immediately started spraying with my Dylusions and stencils and continued with stencils and Distress ink. A lot of stencils and distress later it was my favorite stamp's turn. I really love the rub ons I bought some time ago, and I need to use them more!


Thank you for stopping by! Love to see you next time!

Hugs,
Sandra