Grunge it up card

Click on the image and see how this was made. There is a video tutorial of the process.

In My Garden card

Click on the image and see how this was made. There is a video tutorial of the process.

Timeless Treasure art journal spread

Click on the image and see how this was made. There is a video tutorial of the process.

Father's day card

Click on the image and see how this was made. There is a video tutorial of the process.

Distress it card

Click on the image and see how this was made. There is a video tutorial of the process.

Showing posts with label vinyl. Show all posts

Thursday, November 3, 2011

Sweet Vintage Home card

Hi everyone,

Today I made a card for Simon Says Stamp and Show challenge. The challenge this week is to make a house. I started with my first attempt last monday, because I wanted to do one more halloween themed project. But I couldn't finished it in time, so I'll save that project for next year. So I had to come up with something else for this house challenge.
I had no inspiration yet again, therefor I went looking for a nice little house on the MTC (Make the Cut) gallery. Soon I found a cute little house, but I wanted different windows and a door. So I opened MTC at started working on the house to adjust it to my liking.

This is the result:


Tip: If you use vinyl and perfect pearls Mists, apply the vinyl first and then the perfect pearls mists. Else the perfect pearls come off with the transfer tape.
 Materials I used for this house card:
  • Design paper (Grace Taylor, vintage collection)
  • Distress Ink: spun sugar, vintage photo, worn lipstick
  • Distress stains: Wallnut stain
  • Cabochons (hotfix)
  • Flowers (E line, prima marketing
  • Perfect pearls mists: perfect pearl
  • Vinyl

Thanks for stopping by!
Sandra
Thursday, October 6, 2011

Smashbook day 12: Knipmode & sewing lessons

Hi bloggies!

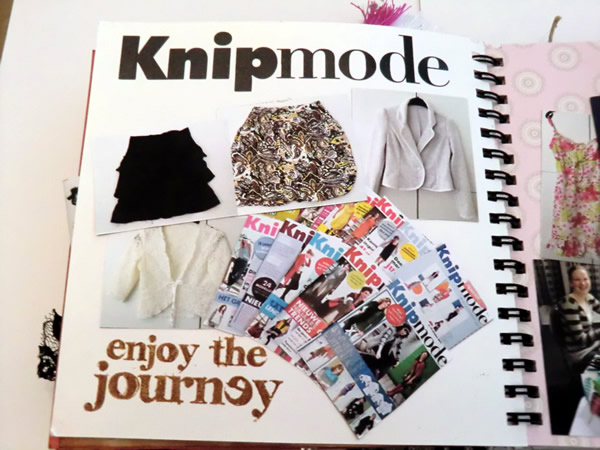
Today I have two themes, Knipmode (magazine for making clothes) and sewing lessons.
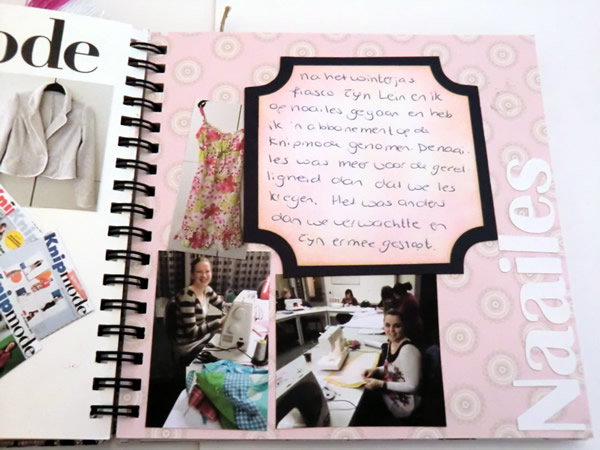
For my birthday I got a Magazine Coupon from my job and I used it for a subscription to Knipmode and around the same time I also started sewing lessons with Lein. I had to get use to the sewing lessons, it was not like we both expected. It was more a gathering and not lessons at all. I wanted to make a new winter coat, so I had a lot of supplies with me, but it soon became clear that I had to learn other things first before I could even attempt the winter coat again.
During that time I got the Knipmode and noticed that there were very nice patterns in it. Unfortunately I do not always understood the explanation, but if I had the chance I asked the questions during the sewing lessons. At home I drew and cut out the patterns and during sewing lessons, I put them together. My fabric stock soon became very big.

On the left page, I cut the letters out of vinyl. I left the page very basic.


On the right page, I cut the letters and tags out with the eCraft. And the upper tag I decorated with distress ink.


Day after tomorrow I'm back again with a new theme, namely Yudu!

See you tomorrow!

Sandra

Saturday, September 24, 2011

Smashbook day 4: Bags!

Hello everyone,

It's day 4 of the smashbook adventure. Yesterday I revealed the theme of today : Bags!
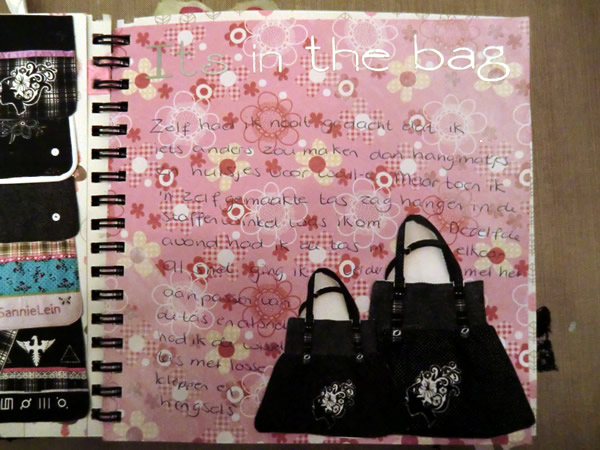
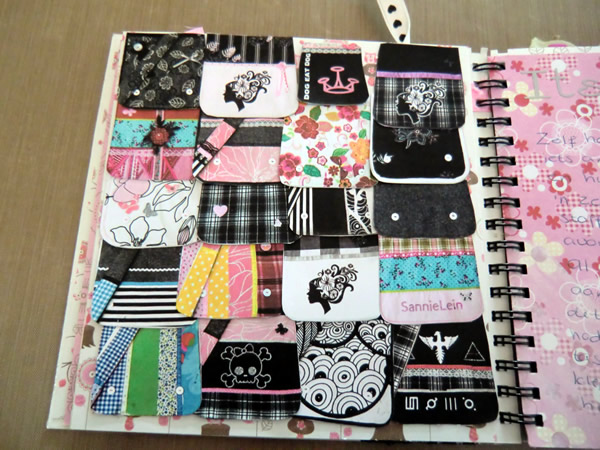
I'd never thought I would make anything else than stuff for Wall-E. When I saw a homemade bag in a great fabric store I bought the pattern after some doubt. I wasn't sure I could pull it off. The same evening I finished the bag! Whoohoo!! I liked it very much and I was foolish proud of myself, haha. Soon I got some ideas to expand the bag with pockets and stuff. Eventually I got a great idea (if I do say so myself) by making the front flaps and shoulder band changeable. So I just need a basic bag and by making a new front flap and a maybe a shoulder band I've got a new bag! The front flaps of the bag have velcro on them as well as the inside of the basic bag. So they're easy to change.
On the left, I have some of my front flaps.I've got about 35 flaps...

 
I used distress stain picket fence on the corners. The letters I cut out of vinyl. It was a tricky job to get them on the paper, because they're so thin. It was was not so smart to write on such a busy background. The bags on the right page are the same ones, and a different kind than de basic bag with changeable flaps :).


Tomorrow two themes!
Until tomorrow.
Sandra