Grunge it up card

Click on the image and see how this was made. There is a video tutorial of the process.

In My Garden card

Click on the image and see how this was made. There is a video tutorial of the process.

Timeless Treasure art journal spread

Click on the image and see how this was made. There is a video tutorial of the process.

Father's day card

Click on the image and see how this was made. There is a video tutorial of the process.

Distress it card

Click on the image and see how this was made. There is a video tutorial of the process.

Tuesday, September 30, 2014

12 tags of 2014 - September

Hi everyone,

I almost can't believe that it's already the last day of September. This month obviously can't go by without taking part in the 12 tags of 2014! What a fun and playful tag Tim made​​ for us!


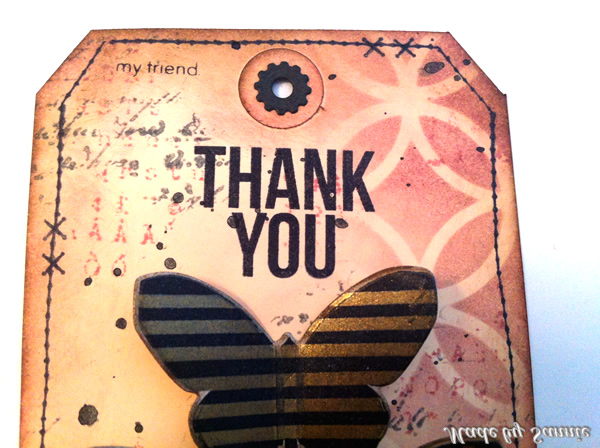
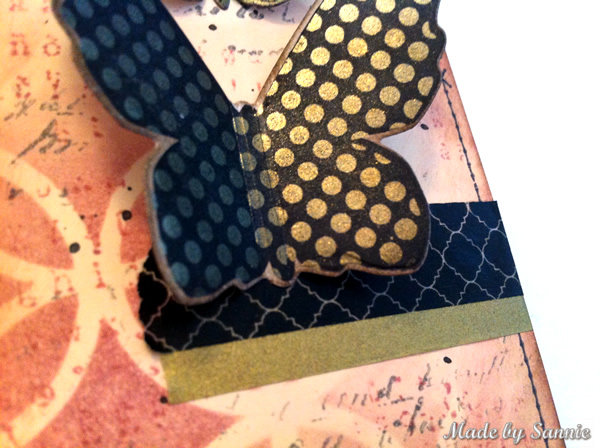
I haven't done mucht with the Butterfly Frenzy die, soI  was happy that I could use it for this tag. I've chosen not to work with the alcohol inks but have worked with Distress Inks instead. Although I actually also hardly use alcohol inks... Oh well, next time I will. Despite the difference in ink, I kept close to Tim's idea for the tag.


Thank you for stopping by! Love to see you next time!

Hugs,
Sandra

Monday, September 29, 2014

Be creative, be silly

Hi everyone,

The end of STAMPtember is almost here. So Simon Says Stamp Monday Challenge has one last STAMPing challenge for you: "Finishing touch stamping". What or which technique gives your project the finishing touch? Please join in and share it with us!


For me are the edges what can make the finishing touch of my project. Like inking the edges with a darker Distress Ink color (mostly brown or black) or go around the edges with black paint. But because the theme is "Finishing touch stamping", I used the Bo Bunny Stitches. Those stamps give such another look to the project. Love that!


I love to play in my art journal and I was a bit silly making these pages. I tried to make a print with the Simon Says Stamp Scrambled Letters stencil and Blackberry Violet paint. With a Brayer I applied a thin layer of paint on the backside of the stencil to use it as a stamp. Unfortunately that didn't work as I hoped. The paint dries too quickly and there wasn't a lot of paint transfered onto the page. Actually I wanted to throw the sheet away and start all over again, but no that is not how an art journal works. So I continued working with Distress Spritzer and Peacock Feathers. Love the subtle look of that.


Then it was washi tape time. This works so well to easily create a composition. Around it I stamped with different stamps. With both the ink and paint. As embellishments I made retro circles in Adobe Illustrator and cut them out with my Silhouette Cameo. And the Simon Says Stamp Scribble Flowers I stamped with Peacock Feathers and Seedless Preserves and then cut with the matching dies. Those are so fun and a bit silly! Perfect combination for these pages!


50dollar_voucher_600px
To join in all you need to do is make a project that fits this weeks challenge and you can be the winner of the $50 gift voucher that our amazing sponsor Simon Says Stamp offers. This prize will go to a random entry. So go over to the Stamp and Show Monday Challenge blog, let the DT members inspire you and join in the fun!

Thank you for stopping by! Love to see you next time!

Hugs,
Sandra

Monday, September 22, 2014

Stamping and stenciling

Hi everyone,

Are you enjoying the amazing month of STAMPtember? Great! Because there is still lots more to come! This week over at Simon Says Stamp Monday Challenge it's all about "Stamp and Stencil fun"!


As you know, I love Finnabair's style and love to play with those techniques and give it my own twists. She also has a very cool art journal and I created my own version of it. One without cover, one without beginning or end. Actually it has lots of different covers. The idea behind this art journal is to keep everything as flat as possible, but to work with many layers and create lots of dimension. This art journal is very simple to make. I cut 10 sheets of Kraft cardstock in half, used my Cinch for the binding. I had two remaining pieces of Binding Wire laying around, so I measured where the holes needed to be, and it was all finished.


I started with the Harlequin stencil and two different colors Distress Ink, Tattered Rose and Dried Marigold. These blend very nicely together, and are so soft. With washi tape I made the composition. Along those lines I have built up the layers, with stamps such as Cartographer, Vintage Vanity, Sunrise Sunset and Romance Novel. The corners needed a bit more contrast. With the Sunrise Sunset stencil and some black colored Embossing Paste, the pages really came together.
As for embellishments I cut with my Silhouette a lot of circles in different sizes. All from one sheet of Kraft cardstock. This will keep me going for a long time. By inking the edges of the circles with Distress Ink, it gets a bit more dimension.


Personally, I take a few photos and I'm definitely not photogenic, but I still wanted a picture on this page. On the internet I found this cute girl on a site full of vintage photos. Click here to go to the site. I printed it with only black ink and voila a picture! Maybe it was better if I had mirrored the picture so she and her dog were facing the other way. Something to keep in mind for future pages.


50dollar_voucher_600px
To join in all you need to do is make a project that fits this weeks challenge and you can be the winner of the $50 gift voucher that our amazing sponsor Simon Says Stamp offers. This prize will go to a random entry. So go over to the Stamp and Show Monday Challenge blog, let the DT members inspire you and join in the fun!

Thank you for stopping by! Love to see you next time!

Hugs,
Sandra

Monday, September 15, 2014

Expirementing with new techniques

Hi everyone,

A new Monday means a new Simon Says Stamp Monday Challenge. It's still STAMPtember, are you enjoying it too? This week is all about techniques. Such as, what is your favorite technique, or maybe you want to try a new one you've never tried before. Show us!


It been a long while since I played with the Gelli Plate. So why not expirement a bit with it. It is always a surprise what I get with it. I started to make a pattern with washi tape.


With three colors of paint (Ruby, Tangerine and Lemon) and Peacock Doily stencil I got the following result. A bit too bright then for what I was going for.


I applied a few strips of Washi tape in the opposite direction. With some White paint and without another stencil or something else to use for some extra texture, I made an almost whole white layer.


Nope, that's not what I had in mind. Well, why not try the Peacock Doily stencil and a baby wipe to try to get rid of some of the white paint? And it worked! Yes a new technique is born! Well for me it is... The paper I used is plain printer paper and you have to be careful with it.


I'm so not good at remembering to take pictures along the way. But the only extra step that I did was to create another layer with the Gelli Plate and Tangerine and Lemon. To bring the original colors back a little. The red was too bright for me. Then I adhered it into my art journal.


Layers, layers and more layers. So cool how with each layer it all comes together. For this layer, I used Gathered Twiggs and one of my favorite Simon Says Stamp stencils, the Diamond Circles.


With stamps and stencils I've applied more layers.


And of course, I need to use washi tape!


50dollar_voucher_600px
To join in all you need to do is make a project that fits this weeks challenge and you can be the winner of the $50 gift voucher that our amazing sponsor Simon Says Stamp offers. This prize will go to a random entry. So go over to the Stamp and Show Monday Challenge blog, let the DT members inspire you and join in the fun!

Thank you for stopping by! Love to see you next time!

Hugs,
Sandra

Monday, September 8, 2014

Stamptember blog hop!

Hi everyone,

It's time, the annual Simon Says Stamp Monday Challenge STAMPtember blog hop starts! If you came here directly, please start at the beginning of the blog hop by clicking here. Thanks!

http://www.simonsaysstamp.com
Simon Says Stamp was founded in 2002 with an interest in exclusively selling rubber stamps. It didn’t take long until we realized we couldn’t stop there. For more than 10 years we have celebrated rubber stamping and its glory. We work to bring companies from around the world together in a one stop shopping environment. Rubber stamps still remain the heart of our business and we are celebrating by hosting a “STAMPtember®" event intended to inspire, educate, and celebrate the delight of rubber stamping. Part of the enticement of rubber stamping is that stamps can be used in creating or complementing ANYTHING! From stamping dates on bank documents and postage parcels in the early 18th century, rubber stamping has dramatically expanded to include card making, scrapbooking, mixed media and many forms of altering and expressing art.

STAMPtember is always a very big happing and the bloghop is always a fun party. For this party, I made a tag with the Bitty Butterfly stamp and die set, but also with the Diamond Circle stencil.


Since it is a celebration, I wanted to use elegant and classy colors, such as Victorian Velvet Distress Ink for the background and Heirloom Gold Perfect Pearls for details and effect.


The technique that I want to share with you today is to create a color on top of a black (stamped) surface. The largest butterfly of the Simon Says Stamp exclusive stamp set Bitty Butterfly is perfect for this technique, since there is a same shaped stamp with a pattern in it. First of stamp with Archival Jet Black Ink the solid butterfly and let it completely dry. Then stamp with Versamark the dotted butterfly. Use a brush with a bit of Perfect Pearls (don't matter which color, if desired even multiple colors) on the dots and brush the excess off. Fix it with a bit of hairspray.


With this tag I want to thank Simon Says Stamp for everything they do and I'm so glad to be part of the amazing Monday Challenge DT.


It's now time to hop to the next in line, and that is the amazing talented Suzz!


50dollar_voucher_600px
To join in all you need to do is make a project that fits this weeks challenge and you can be the winner of the $50 gift voucher that our amazing sponsor Simon Says Stamp offers. This prize will go to a random entry. So go over to the Stamp and Show Monday Challenge blog, let the DT members inspire you and join in the fun!

Thank you for stopping by! Love to see you next time!

Hugs,
Sandra

Monday, September 1, 2014

Bold number stamping

Hi everyone,

It's September and that means STAMPtember at Simon Says Stamp. This month is entirely dedicated to stamping and this also goes for the Simon Says Stamp Monday Challenge. The theme for this week is 'Bold Stamping'! Do you want to stamp with a bright bold color or maybe you have a big bold stamp, or be in any other way bold in your stamping. Go for it, we want to see it!


This week I worked my art journal and I stamped with the bold numbers of the Purveyor set. I think that stamp is really cool. It was time for much texture and dimension. And I started with a layer of Gesso  and after that was dry I applied the mesh I got at the hardware store. I applied multiple layers of Multi Medium Matte ​​to make sure that I was propely adhered.


When it was dry, I applied a few different colors of Distress Ink to my Craft Sheet and with a bit of water and a brush, I applied the ink as if it were watercolor. The next step was playing with some Embossing Paste and the Bubble stencil for more texture.


Finally it was the Bold numbers turn. Think it's a cool effect stamping on an uneven surface. Despite my attempts to adhere the mesh down, two pieces got loose so I removed them. Because of the Multi Medium you hardly see that those pieces aren't there anymore.


50dollar_voucher_600px
To join in all you need to do is make a project that fits this weeks challenge and you can be the winner of the $50 gift voucher that our amazing sponsor Simon Says Stamp offers. This prize will go to a random entry. So go over to the Stamp and Show Monday Challenge blog, let the DT members inspire you and join in the fun!

Thank you for stopping by! Love to see you next time!

Hugs,
Sandra